Posts mit dem Label p2 werden angezeigt. Alle Posts anzeigen

Mittwoch, 22. Januar 2014

Black Dotted Gradient

Halloo Mädels!
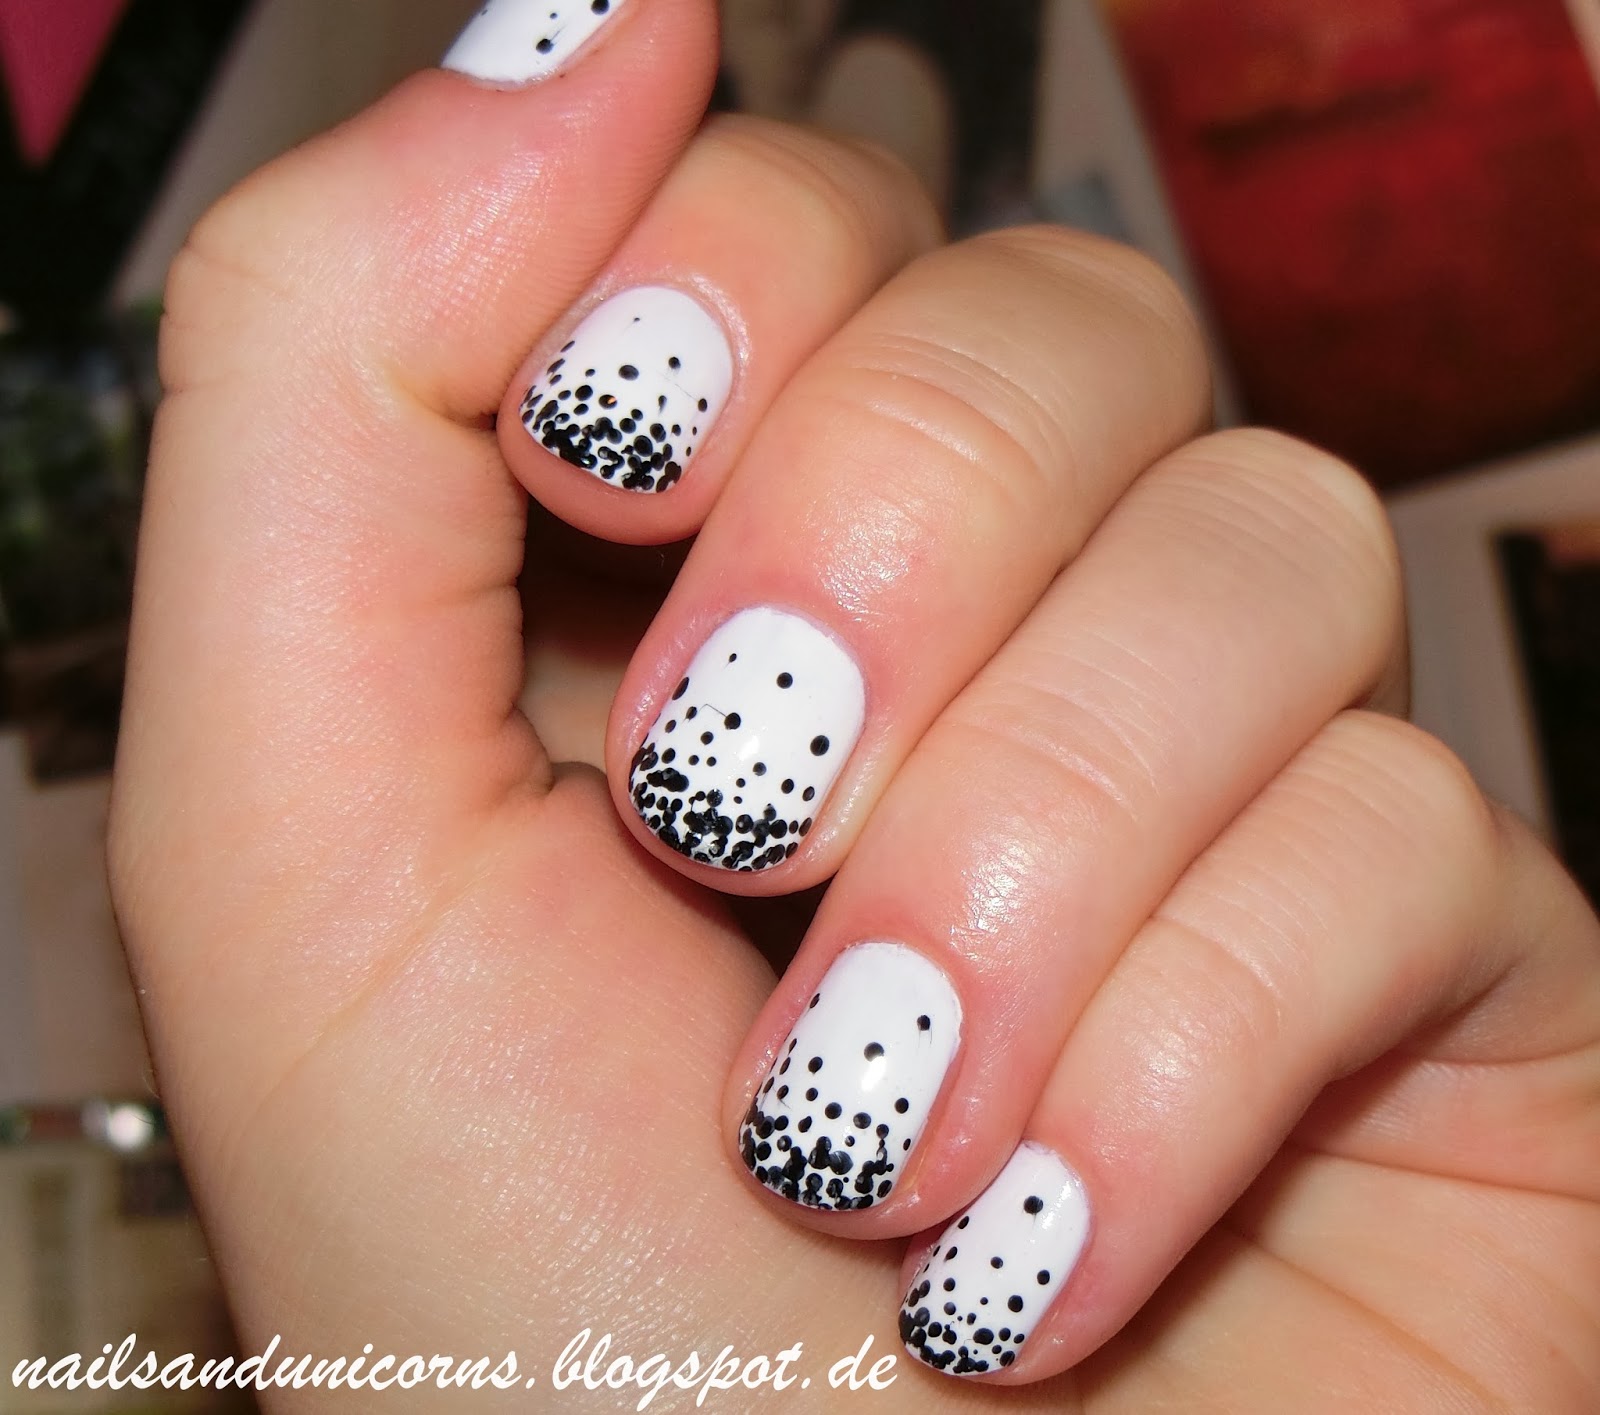
Jetzt hab ich grade n Lauf und poste direkt mal die nächsten Nägel, die sich in den letzten Monaten angesammelt haben! Die Nägel habe ich zu Anfang meiner Ausbildung gemacht und die haben sage und schreibe 10 Tage gehalten. Und ich mache im Moment eine Ausbildung zur Zahntechnikerin, mache also nur handwerkliches und war deswegen echt überrascht, dass der weiße Nagellack von Essie dann trotzdem so lange gehalten hat.
Davon habe ich zwei Schichten aufgetragen und anschließen mit einem Dotting Tool die einzelnen Punkte gemacht. Dazu habe ich an der Spitze angefangen und dort die Punkte dicht zusammen gesetzt. Nach oben hin sind die Punkte dann immer weiter auseinander.
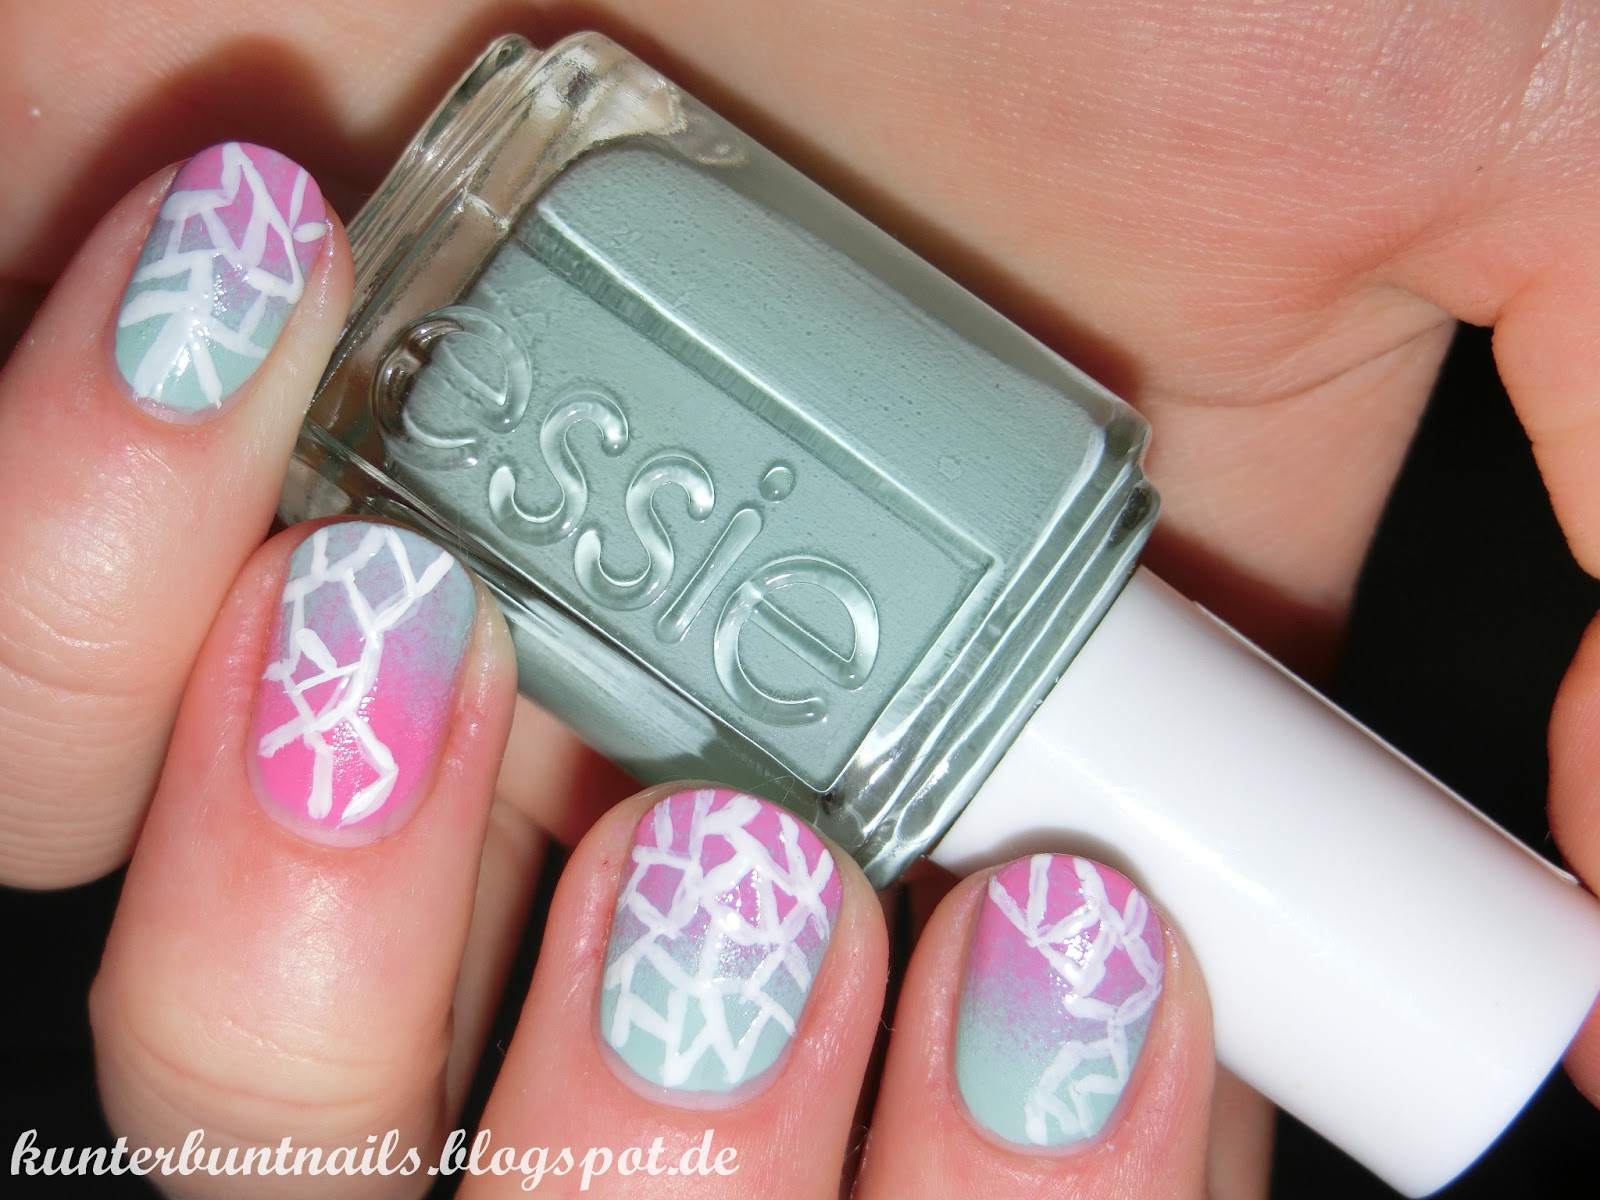
Ich mochte das Design sehr gerne weil es neutrale Farben sind welche man super kombinieren kann.
Außerdem ist es ein tolles auffälliges Design welches aber nicht zu viel zeit beansprucht und man dafür auch nicht so viele Farbe benötigt.

Essie - blanc
P2 - eternal 

Vielen Danke fürs Lesen und über weitere Follower würde ich mich sehr freuen! :)


Montag, 5. August 2013

Tribal Mix

 Heellooo! So here's another post from the nails I'm wearing right now. I decided to do a tribal mix with many different designs. Every nail should be unique. I did this pattern with the colors orange and coral because I think they do very well together! I used two different brushes and a dotting tool to create the lines and dots.
I've done tribal nails half a year ago (you can find them here) but at this time I haven't had any good brushes and I think that shows up very well :D So I hope that you like  this tribal nails!
thanks for reading and following!! :)

Essie - blanc
P2 - be tropical!
P2 - eternal
Kiko - 7


Dienstag, 30. Juli 2013

Wrap Mani


Hi everyone!! Sorry if you couldn't find my blog and if you though I was lost! :D But as you see I renamed my blog and a good friend of mine did this awesome new layout! thank you again! :)
If you missed me than just follow me and you will never have to search my blog again! 

So the first thing I did when I was back in Germany was of course buying some new polish. I brought this nice orange base color that you can see shimmering through the pink. I did this great combination of orange and pink cause it reminds me of dunkin donuts. I really love this store and it is way too long ago that I've been there. :( Unfortunately we don't have that much stores in Germany.
Yea whatever..aah the wrap mani! I've seen many people using this strategy and I couldn't believe it works so well, so I had to try this on my own.
Before you polish your nails you should wrap 3-5 clear tape pieces to a little ball. After that you choose a base color, apply it and let it dry completely. If not, you might "destroy" the base color if you use the tape and there could occur  holes. If everything has dried you put on a thin layer of your second color and dab the tape on top. You can do it until you like the pattern that appears then. And that's it actually! I really love this method because it is a fast nice mani with a very cool look!

P2 - 910 feel tropical!
Manhattan - Lotus Effect

Do you like the combination I choose or would you suggest others I could try one more time?
thank you for reading!! :)


Freitag, 19. Juli 2013

Pastell with Leo Print


Helloo again!! I'm back from my summer vacation. I spent the last two weeks on the balearic island mallorca and I had a really nice time there! I am already looking forward to my next vacation in summer. Then I hope to visit Ibiza with my best friends! <3
So however, here you see the nails that I wore for first 8 days!! on mallorca. I really couldn't believe they lasted for so long because I spent the whole day at the beach. But anyhow the saltwater, the sun, the sand and the sunscreen couldn't harm my nails. :)
I decided for this design and this colors because I didn't want to  use a single color and absolutely wanted to do the leo print again! I also just got these two new colors from P2 which I wanted to try. P2 recently got this new volume gloss-gel look polish collection. The polishes have a bigger and rounded down brush which simplifies the application. Two coats cover the nail very well and they are very glossy.
So when I did this design I started with a white base color and applied the colors in turns. I always kept one stripe or one triangle on top white. On these areas I added a black leo print to let it look more interesting.
I hope you like my design! thanks for reading! :)

Essie - blanc
P2 - sweet darling
P2 - heavenly girl
Essence - be flowerful


Mittwoch, 26. Juni 2013

Summer Attack

 Helloo! :) Well, unfortunately the summer in Germany is over somehow. So my prevention not to get any depressions is to produce the sunshine on my nails!
When I saw this new collection of P2 polishes I absolutely had to buy them! It seemed like they were talking to me and said to me "Hey you! buy us! we are so shiny and glittering!" So I had no choice and I really do love this polishes! they are so pretty!! I bought this collection in the colors yellow and red but they are also available in orange, purple and green.

P2 SUMMER ATTACK - lemon drop
P2 SUMMER ATTACK - hot berry


 Here you see the nice red polish which I like much more than the yellow one because it has more and a little bit bigger glitter inside.

 When I saw this two polishes I immediately thought of doing a gradient with them. I wanted to create something that looks like sunset *-*
 At the same day the order from amazon finally arrived so I needed to put some sparkle stones on my nails. I love these stones and I think I will use them very often! In this set are twelve different colors including collectively 1000 stones. And this for only 0,33 cent!!! Really awesome!


so this is my result with my new stuff and I hope you guys like it! Which color do you like the most? thanks for reading!! :)

Donnerstag, 13. Juni 2013

Mint and Pink Gradient with White Pattern


Helloo! Today I'm getting the certificate of  my german Abitur :) It's a single event and the prom is in two days. So today I'm wearing a simple white, strapless, short dress with laces. Because of my plain dress I wanted to do a colorful mani and that's what came out!
First of all I have painted my nails in the base color mint except for the ring fingers. They became pink. After that I created a gradient with both colors using a cosmetic sponge. Then I used a thin brush to paint the white pattern on my nails.  I ended up with a matte topcoat.

How do you prefer the design? Shiny or matte?

Please follow me that you don't miss my prom mani in two days! :)
thanks for reading! hope you like it!!


Essie - mint candy apple
P2 - flirt with me!
Manhattan - pro french tip whitener
Essence - soft touch


matt-finish:


Donnerstag, 23. Mai 2013

Splatter Mani + Tutorial!!!

 Hey Ladies! Today I have a rose, black and white splatter mani for you! When I decided to do this design I wanted do create it with a colorful base colour and neutral splatter colors. I just wanted to make sure that this mani looks good so I thought I am on the safe side if I do it with black and white.
However this was the first time I did a  splatter mani and  I think I will do it again! I really love the individuality of every nail and I totally enjoyed blowing on the colors. That was fun. I also like the changeableness cause you can create very colorful designs and combine nearly any colors and I bet the result will look great! Because of this I think everyone should try a splatter mani and thats why I made a tutorial for you! splatter mani is really easy I think and everyone should try it!


P2 last forever - 140 flirt with me (base)
P2 color victim - 500 eternal
Manhattan pro french tip whitener


Tutorial:

1) choose a base colour
2) cut a straw into 3 or 4 pieces
3) better tape your nails .otherwise you have to clean up a lot in the end ;)
4) dip the mini straw into the polish, but not to deep then there's too much polish in it. 2-3 mm is        enough
5) blow strongly with a distance of ca. 10cm.


and that's it actually. After that you only have to remove the tape and clean up the rest of your cuticle with a q-tip! 

I hope you like my splatter design and my tutorial! tell me what you think!
thank you for reading :)

Samstag, 6. April 2013

Fairy Dust


 Hallloo Leute! Heute habe ich für euch wieder einen super tollen rosa Glitzer Nagellack im Angebot!
Der steht schon ca. seit zwei Wochen bei P2 im Regal und jetzt konnte ich nicht mehr wiederstehen. P2 SAND STYLE gibt es auch noch in weiteren Farben, die ich aber alle nicht so überzeugend fand wie das Rosa, weil das die größten Glitzer Stückchen hat. Das Besondere an dem Nagellack, wie der Name schon sagt, ist, dass er eine sehr interessant Sand-Optik hat. Sobald auch die zweite Schicht gut getrocknet ist, kommen die einzelnen Glitzerpartikel besonders gut raus und der Nagellack fühlt sich auch sehr rau an. Aufgrund von der Sandoptik finde ich auch, dass der Nagellack viel mehr glitzert als die normalen Glitzer Nagellacke. Ich habe hier auch keine Überlack aufgetragen, damit die Oberfläche eben rau bleibt und ich das Ergebnis nicht "verfälsche". Ein Problem könnte sich bei dem Lack aber leider ergeben. Aufgrund der rauen Oberfläche vermute ich, dass sich beim Entfernen mit Nagellackentferner das ganze Wattepad auflöst und es somit verdammt hart wird den Nagellack wieder loszuwerden. Aber das werde ich denn ja später sehen und dann berichte ich euch nochmal!


Sonntag, 17. Februar 2013

Indian Tribal Nails


 Sooo leude. Endlich hab ich mal wieder die Zeit hier meine Designs zu zeigen. Viel zu tun im Moment! Aaalso heute seht ihr ein Indian Tribal. Das wollte ich eine ganze Zeit schon machen, fand es aber immer zu schwer, und habe mich somit immer davor gedrückt. Aber als ich es ausprobiert habe fand ich heraus: es ist wirklich schwer! Finde ich...aber wie dem auch sei, ich hab es trotzdem so gut wie es ging versucht und bin mit dem Ergebnis eigentlich auch ganz zufrieden. 
Also um auch so ein Muster auf eure Nägel zu malen grundiert ihr eure Nägel zunächst mal weiß. Dann benötigt ihr zwei verschienden dicke Pinsel. ich habe einen sehr dünnen und  etwas dickeren als den dünnen verwendet da ihr im nächsten Schritt nämlich Streifen in unterschiedlichen Größen auf eure Nägel malt. Bei den Farben habt ihr eigentlich freie Wahl. Ich habe mich für die standart Faben für das Muster entscheiden aber ich denke mit Minze, Rosa und Lachs würde es auch supi aussehen. 
Habt ihr denn so im Durchschnitt 4 Streifen auf je einem Nagel fangt ihr an mit schwarzem Nagellack und dem dünnen Pinsel einige streifen einzurahmen und Muster hinzuzufügen, wie z.b. zick zack, Punkte oder senkrechte Streifen. Habt ihr das geschafft seid ihr auch schon fertig. Ich finde es besonders schwierig bei diesem Design gerade Striche zu machen. Besonders am Ende mit schwarz. Weil die Farbe so raussticht und der Kontrast so stark ist. Ich war auch sehr froh als Ich endlich fertig war muss ich zugeben :D
 

Mittwoch, 30. Januar 2013

Coral French Manicure + Leo

 Halloo! Heute habe Ich mal ein Design ausprobiert, was Ich bei diesem Blog gesehen habe. Ich fand das sofort total schön und dachte mir, weil ich noch nie was mit French Manicure hatte, probier Ich das doch mal aus! Ich habe nur ein bisschen andere Farbtöne genommen. Und zwar: als Grundlage erstmal YVES ROCHER shiny pastel nail polish, dann die French Manicure mit KIKO 360. Dafür habe Ich einen  kleinen Pinsel benutzt. Leichter geht es bestimmt mit Schablonen, aber ich hatte grade keine da und finde das unnötig extra welche zu kaufen. Mit dem Pinsel hat das ja auch supi geklappt! Anschließend habe ich turquisene Punkte mit ESSIE mint candy apple gemacht, und diese dann letztendlich mit P2 500 eternal umrandet. Noch ordentlich Überllack drauf und schon ist man fertig!:) Ich hoffe es gefällt!


Mittwoch, 26. Dezember 2012

time-out für die nägel


Da die Fingenägel natürlich immer sehr beansprucht werden wenn andauernd Nagellack drauf ist, ist es wichtig ihnen auch mal eine Pause zu gönnen. Ich versuche einmal die Woche einen Tag lang mal keinen Nagellack aufzutragen und dann ist bei mir Spa Time! angesagt. Deshalb habe ich mir mal ein Paar Pflegeprodukte zugelegt.

1) Die Bathing Pearls: einfach in warmen Wasser auflösen und ca. 10 Minuten die Finger aufweichen lassen. ich würde aber einen Schuss Kokosöl oder eventuell Milch dazugeben. das pflegt die Hände mehr. Danach lässt sich die Nagelhaut einfach zurückschieben oder entfernen und die Hände duften wunderbar!

2) Ein ganz leckeres Wellnesspeeling von P2. Das lässt die Hände weich und geschmeidig werden und pflegt zusätzlich mit Ölen.

3) Ein Öl gegen brüchige Nägel

4) Reichhaltige Creme für spröde Nagelhaut. Ideal für den Winter, wie ich finde. Im Winter drehen die Hände so wie so immer durch.

Sonntag, 23. Dezember 2012

Christmas nails

meine weihnachts-fingernägel für dieses jahr! also vorlage für die muster habe ich die beiden pullover (s.u.) verwendet.


mein weihnachts rot ist von P2 "fever". mein favorit für diesen winter!

für das weiß für die muster habe ich von manhatten das french manicure weiß verwendet und mit einem dünnen pinsel aufgetragen. FROHE WEIHNACHTEN!