Posts mit dem Label black werden angezeigt. Alle Posts anzeigen

Mittwoch, 22. Januar 2014

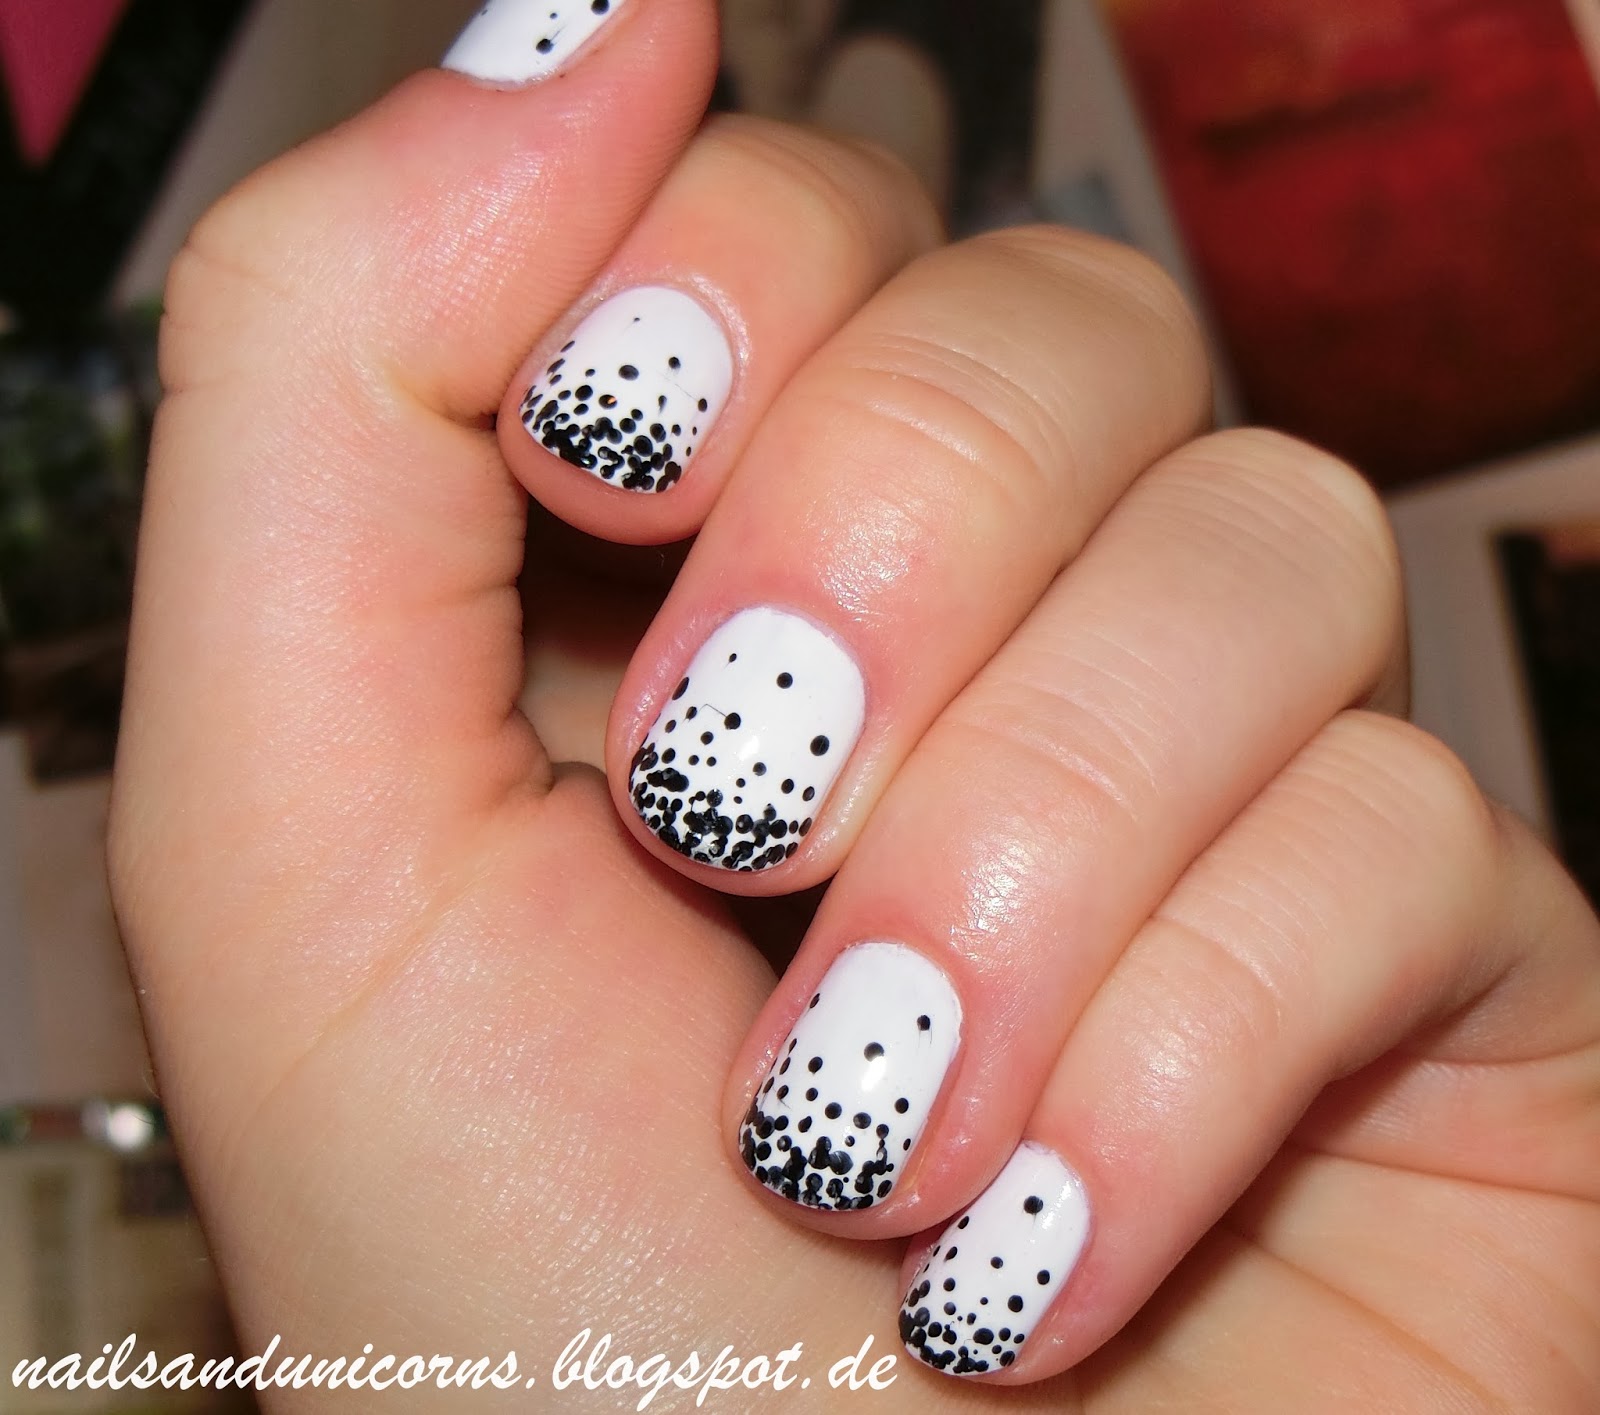
Black Dotted Gradient

Halloo Mädels!
Jetzt hab ich grade n Lauf und poste direkt mal die nächsten Nägel, die sich in den letzten Monaten angesammelt haben! Die Nägel habe ich zu Anfang meiner Ausbildung gemacht und die haben sage und schreibe 10 Tage gehalten. Und ich mache im Moment eine Ausbildung zur Zahntechnikerin, mache also nur handwerkliches und war deswegen echt überrascht, dass der weiße Nagellack von Essie dann trotzdem so lange gehalten hat.
Davon habe ich zwei Schichten aufgetragen und anschließen mit einem Dotting Tool die einzelnen Punkte gemacht. Dazu habe ich an der Spitze angefangen und dort die Punkte dicht zusammen gesetzt. Nach oben hin sind die Punkte dann immer weiter auseinander.
Ich mochte das Design sehr gerne weil es neutrale Farben sind welche man super kombinieren kann.
Außerdem ist es ein tolles auffälliges Design welches aber nicht zu viel zeit beansprucht und man dafür auch nicht so viele Farbe benötigt.

Essie - blanc
P2 - eternal 

Vielen Danke fürs Lesen und über weitere Follower würde ich mich sehr freuen! :)


Montag, 12. August 2013

Manhatten&Playboy Super Nails PART I


Helloo! Today's blog post is all about the Manhattan Playboy collection. I brought three of these, as you can see in my pictures. One is a regular nail polish called "suberb sparkle". This is a pretty much covering polish with pink glitter inside. I was really exited to try this polish because I really like the combination of black and pink.  So I was very disappointed when the glitter didn't turn out on the nails as it did in the bottles. But fortunately I brought a glitter top coat called "glitter champion". And this was the chosen one I added to the black-glitter polish. I really liked the result. The glitter top coat is full of small glitter pieces in many colors like red, pink, blue and gold. I am so in love with it! I applied two coats of it and my nails were very shiny!
Furthermore I brought a second glitter top coat called "captain sparkle"(down below in the second picture). I haven't tried this one out yet but this will be PART II of my Manhattan&playboy review. So check it out!

Thank you for reading! :))


Donnerstag, 23. Mai 2013

Splatter Mani + Tutorial!!!

 Hey Ladies! Today I have a rose, black and white splatter mani for you! When I decided to do this design I wanted do create it with a colorful base colour and neutral splatter colors. I just wanted to make sure that this mani looks good so I thought I am on the safe side if I do it with black and white.
However this was the first time I did a  splatter mani and  I think I will do it again! I really love the individuality of every nail and I totally enjoyed blowing on the colors. That was fun. I also like the changeableness cause you can create very colorful designs and combine nearly any colors and I bet the result will look great! Because of this I think everyone should try a splatter mani and thats why I made a tutorial for you! splatter mani is really easy I think and everyone should try it!


P2 last forever - 140 flirt with me (base)
P2 color victim - 500 eternal
Manhattan pro french tip whitener


Tutorial:

1) choose a base colour
2) cut a straw into 3 or 4 pieces
3) better tape your nails .otherwise you have to clean up a lot in the end ;)
4) dip the mini straw into the polish, but not to deep then there's too much polish in it. 2-3 mm is        enough
5) blow strongly with a distance of ca. 10cm.


and that's it actually. After that you only have to remove the tape and clean up the rest of your cuticle with a q-tip! 

I hope you like my splatter design and my tutorial! tell me what you think!
thank you for reading :)